In this second practice, we will need to program Arduino for firts time. To be able to program the Arduino board we will use Arduino IDE, with this user graphic interface:
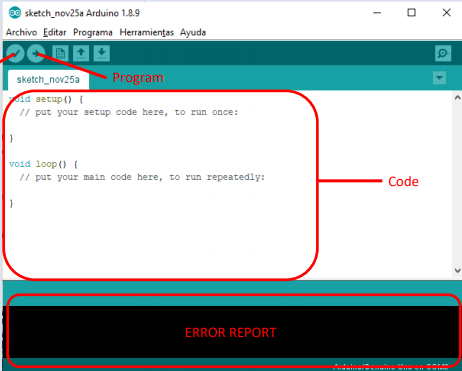
As the picture shows, the Arduino software is so simlpe,there is a body programing code placed and once code is written to be compiled with the button with a tick on it, due to this we will be able to know if the code is correct or there is any error that will be notified on the lower part of the window. When we make sure that there is no error we proceed to Arduino using USB cable that is connected at Herramientas -> Puerto -> COMX and pushing the button with the arrow.
In the second practice we will introduce a new component which is a button. This will be used to switch on and off a LED. This time we will have to write some code in C language. First of all, we will learn how to connect the protoboard devices to the Arduino.
LED: we need to create a circuit with the LED and the resistor and then link it to a port of the Arduino
Button: it requires a basic circuit that must be instaled properly for not having errors. We need the resistor for this part as well.
TINKERCAD:https://www.tinkercad.com/things/f0AYQy9Zd8i-shiny-gaaris/editel
